Joyee here! I’ve previously written on Latina On a Mission, but I have to say today’s post had me super excited!
For this post, I created a make up tutorial. I had the help of my wonderful friend Joyce Soto who didn’t mind letting me use her for this smoky look. For a party or a night out with friends, a smoky look can never do you wrong. Smoky eyes are great for a sexy and sophisticated look.
Here’s my smoky eyes tutorial. Remember, start with a clean and moisturized face!
STEP 1
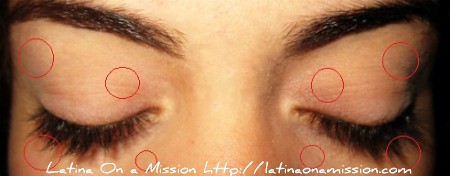
Before applying your foundation on the eyes, have a small amount on the back of your hands and warm it up by using a finger. The heat from your finger can make it easier for you to blend in your foundation. Dot your foundation onto your eyes as shown below. Preferably using the tip of your ring finger, gently blend the foundation. If you use concealer, only use a smaller amount for dark circles and the inner corner of the eye to make your eyes look brighter. Using too much concealer when you already have foundation on will make your eyes all cakey! Next, finish it off with Cover Girl’s Clean Pressed Powder, Oil Control. This will help with applying our creamy eye shadows.
STEP 2
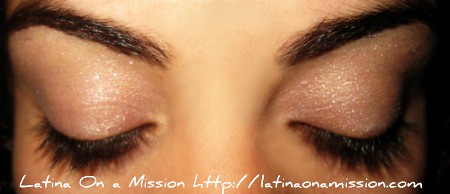
For this tutorial I am using Cover Girl’s Smoky Eye Shadow Blast in Silver Sky 805. Apply Step 1 of the two colors onto your eye lid. Emphasize on the inner corners of your eyes, the brow bones, and the middle. If the color comes out light, do not over apply! It’s a cream eyeshadow, so constantly applying this eye shadow until the color shows will just cause more of a hassle for you! Instead, use an eye shadow of a similar color. This makes the color bright and vivid, and it can also prevent the cream eye shadow from creasing.
STEP 3
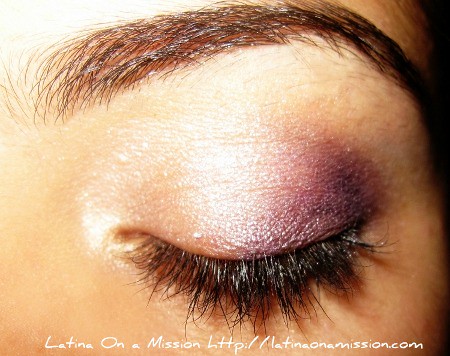
Using Step 2 of the eye shadow, start at the outer corner of your eye and apply the color half way towards the middle of your lid. Again, use an eye shadow of a similar color to set the color of the eye shadow and blend out the color.
STEP 4
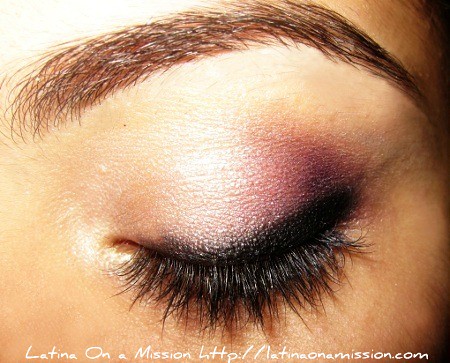
Using Cover Girl’s Liquiline Blast Eyeliner in Black Fire, create a thick line along your lash line. Extend the line a little bit past the corner. Blend out the harsh line until it looks like it’s fading into the eye shadow.
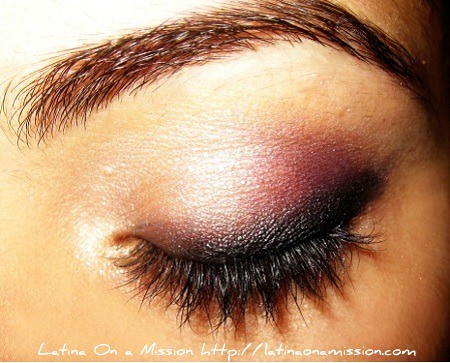
STEP 5
Line your upper lid again, this time thinner, and fill in your waterline. For those who might have difficulty lining your waterline, do NOT yank your eye down to force your waterline to show. This does not make it easier for you! Not only can it cause future wrinkles because the skin around our eyes is thin and sensitive, it can also expose the inner parts of the eyes, which is very risky. From experience and watching some of my friends try to quickly line their waterline, half of the time the pencil’s touching the inside of their eyes! The risk of eye infections from our recklessness! Use a q-tip and press gently under your eye and tilt you head down when you look at the mirror. The pressure you use on the q-tip should be enough for you to tell where your waterline is, but it should not be so much that the flesh from inside are obviously visible.
Take your time and start from the outer corner to your inner corner. Line outside your waterline near the outer corner of your eyes and blend to create a smoky look for the bottom of your eyes. Really, take your time – if you need to blink, then blink. Being patient with your make up is worth it once you see the results of your hard work!
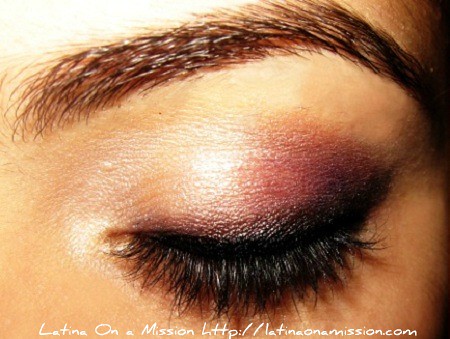
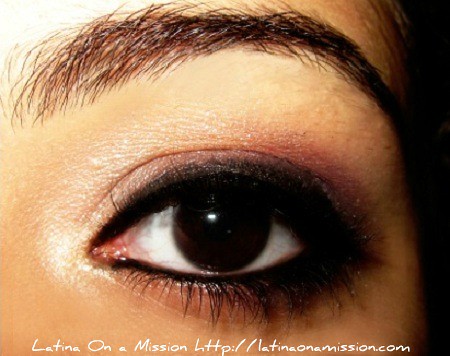
STEP 6
Last finishing touch? Mascara! Curl your eyelashes before applying mascara. For this tutorial I will be using Cover Girl’s Lash Blast Fusion. If you have a lash brush, brush your lashes to make it easier and neater to apply your mascara. For your upper lashes, slightly tilt your head back and, as if you’re looking at your chin, apply your mascara in order to prevent accidental smudges on your upper eyelid. You can apply at most two coats of mascara. For the bottom lashes, remove any excess amount of fluid from your mascara wand and using the tip, apply light pressure while you look at the mirror at eye level. Apply less when you reach around the inner corner of your eyes. If some mascara gets onto bottom of your eyes, do not panic, this might be useful for your smoky look! Using a q-tip or a sponge, blend the mascara into your eyeliner.
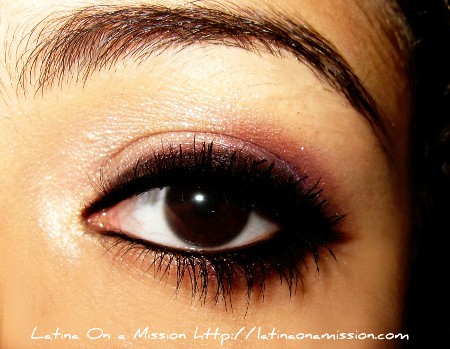
There you have it! Joyee’s tutorial for smoky eyes.
Another important tip that every woman must keep in mind: confidence.
Feel good, look good, and you’ll do good!












{ 3 comments… add one }
I LOVE LOVE this look! I’ve always tried to master the smoky eye, but it never goes well!! Will def be using this tutorial! Thanks for posting!
Alexandra recently posted..Shop Black Friday deals in July on Target.com !
Alexandra I love how Joyee explained all the steps, even including the CoverGirl products needed. She made it so simple and it looks fabulous when completed! I’m sure you are going to rock it!
Ms. Latina recently posted..CoverGirl Smoky Eyes Make Up Tutorial
After second attempt i got it ! (after first one i looked like angry emo kid)
Thanks – I love it!
Luke recently posted..Get a degree quickly